Over the last couple of years, trimmers have begun reaching out to me with questions on how to improve the quality of their work. While I’m happy to help, I don’t always have the time to answer right away or provide them with a thorough response. Therefore, I’ve decided to write an article for The Hog Ring sharing 10 tips on how to take your work to the next level.
In essence, the tips answer some of the most common questions I receive — like “How do I avoid creases in leather?” and “Why is my piping so wavy?”
For some trimmers, these tips will be old. For others, they’ll be new. Who knows? You might even do things differently and it works. That’s okay. These are simply the way I do things at my shop, Brent Parker Motor Trimming, and I hope you find them helpful.
1. Gluing Leather to Foam
In my opinion, this is a big no-no. Because leather is generally stored rolled up or folded, it needs to be stretched out, flattened and worked onto a job to get its wrinkles and creases out. If you glue it to foam, you’re essentially gluing those creases and wrinkles in place.
Wherever possible, cut your foam oversize, sew your piece to the foam, and then trim off the excess. You really want your material and foam to work independently.
2. Trimming Concave Curves
Of course, there are times when you have no other choice but to glue leather to foam. This is true in cases where you’re dealing with odd shapes, such as concave curves.
The biggest mistake that trimmers make is gluing the two pieces together flat on a bench and then expecting it will curve without creases. A clever work around is to lay the foam in the curve and then glue the piece of leather to the foam while it’s in there. This will reduce the likelihood of creases.
Another tip to eliminate creases when dealing with concave curves is to leave the glued panel to dry for 24 hours before sewing so that when it’s folded the glue doesn’t soak through the materials’ pores and stick together which causes creases.
Problem solved!
3. Marking Templates
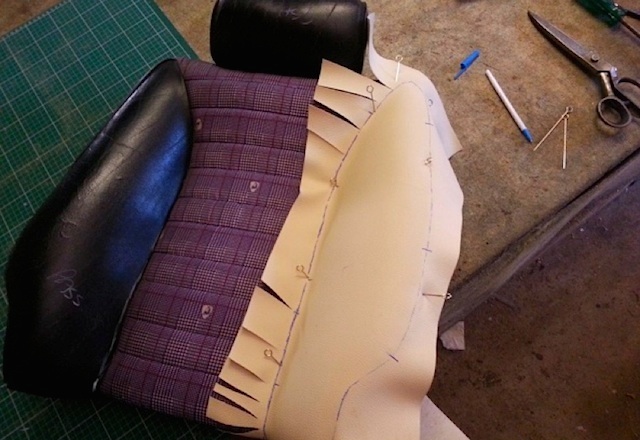
When marking out new templates, pin a similar scrap piece of material to each panel you’re marking out. (Especially on seats like Mercedes-Benz where the side bolster wraps right around the top).
Pin it on nice and firm, but not too tight. Make lots of attachment marks. By doing it this way you know it will fit because you have essentially just fitted it to the seat.
I almost never take the old cover off before I mark out new pieces. Why do I do it this way? Because in most cases, pieces like a side bolster have been on for many years and have been stretched and hardened by the sun, so trying to unpick that panel and getting it to lay flat for an accurate pattern is near impossible. If you don’t believe me, try marking out both ways then compare your two templates and see how much they differ.
4. Sewing Piping
Whenever possible, always sew your piping to either your front or side border, or the piece without the pleats, first. This will prevent rippling.
For example, say you have a bench seat with pleats front to back that are each 2-inches wide going along the length of the seat. If you sew the piping to the pleated piece first, you’re attaching it to all those ups and downs, which essentially lengthens your piping and causes it to ripple. However, if you sew the piping to the box border first and then sew it to the pleats, it will sort of float over the pleats and keep the piping tight and looking good.
5. Lay Off Fat Piping
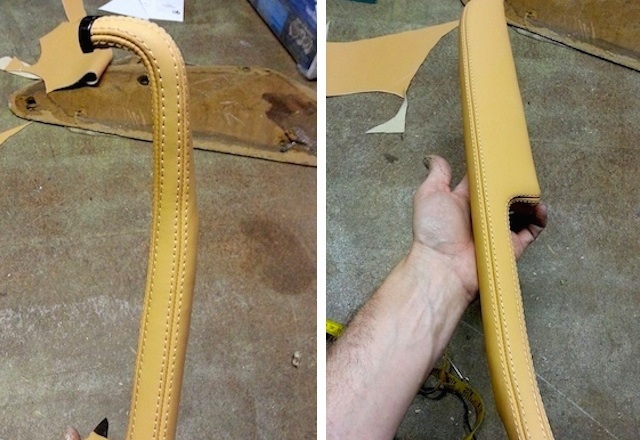
One of my pet peeves is seeing thick piping on seats. In my opinion, using thin piping looks so much neater.
Do yourself a favor and find somewhere that you can take your leather strips to get them split thinner. Not only does it look better, but it’s so much easier to sew because you have less bulk.
Also, try buying a few different thicknesses of tubing to go inside your piping. Because if you can’t get your leather thinned you can at least counteract the thickness by reducing the size of the tubing inside.
6. Top stitching and French seams.
I often see jobs where trimmers made their top stitch too far away from a seam, which looks untidy and can result in unsightly ripples, especially around corners, due to the selvage going all wavy. If you stay close to the seam, you can trim close to the top stitch and get rid of the wavy selvage.
The same goes for French seams. Keep the width small (no more that 7mm). Doing so looks neater and causes less drama.
Another quick tip: Try and make your bobbin thread the same color as the material your sewing.
Also, check out my tutorial on how to make a seamless French seam. I learned this little trick from a very experienced Malaysian trimmer and it’s helped so much with certain jobs. It’s not for seats but works great on hard surfaces that don’t get much wear.
7. Reduce Your Bulk
I can’t stress enough the importance of reducing bulk in all aspects of your sewing and fitting. It can really make the difference between a good and bad job.
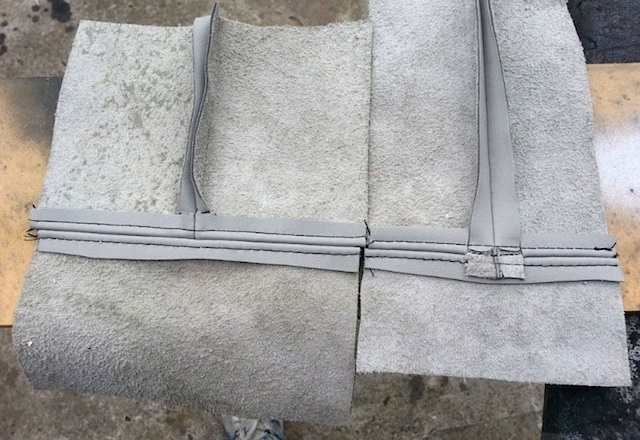
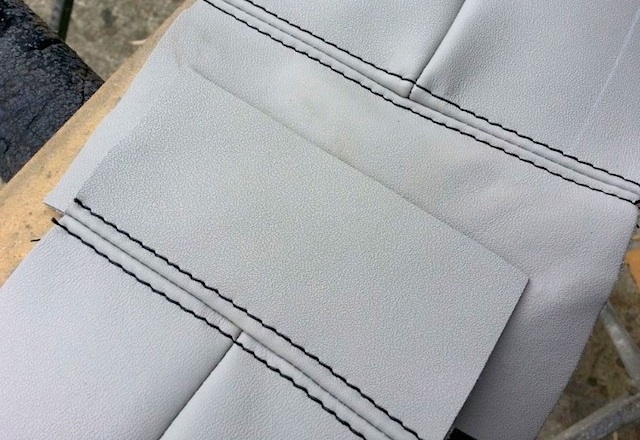
You must learn to cut away selvage, trim the pieces to raw edge and butt together pieces of material so you see no raw edges. This will make a significant difference in your quality of work. Also try and keep the amount of foam in your sewing to a minimum. If you need to add foam to your seat, then add foam to your seat not into the sewing of your cover.
The photos below show what a difference can be had when you make the right cuts and reduce and distribute bulk.
8. Use EVA Closed Cell Foam
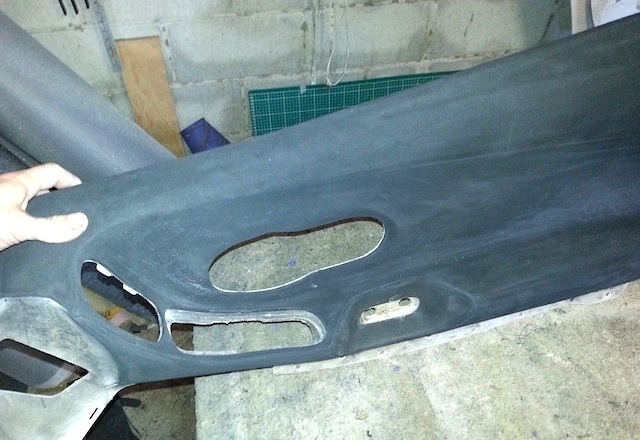
Incorporating EVA closed cell foam into your work will change the way you do things. Without it there is no way I could get some of the finishes I’ve been able to achieve, especially on all the dashboards I do. Ordinary foam simply doesn’t cut it.
Not only does EVA foam feel nice and firm when touched, its firm density works fantastic in getting wavy bumps out of a surface because it’s sand-able. Just wrap 100-grit sandpaper around a block and sand out all the bumps. Trust me, it’s much easier than trying to get a smooth surface with body filler.
9. Find Your Inspiration
I’m always on the lookout for inspiration; it’s everywhere around you! You just have to look.
Check out other people’s work to see what they are doing. Don’t copy them, but you can take some hints on what they do. Also look at other people’s quality of work. You might think you’re up to standard, but then you see what someone else has done and it clicks in your head, “Wow I need to do better.” But don’t be intimidated by that thought. Instead, use it to your advantage to get better.
Don’t be afraid to ask questions of the people you look up to. You will find most guys will share their knowledge as long as you ask in a respectful way. For example, if you ask someone a question on Facebook and they reply, then take the time to thank them. It’s a small detail that can go a long way.
I also can’t stress enough how important it is to surf the Internet looking for ideas. I can literally spend hours every night looking for all sorts of ideas. Whether researching new materials and suppliers or watching trimmers work on YouTube, the amount of knowledge you can find on the web is endless and invaluable. In the end, it’ll make you a better trimmer because you’ll have more knowledge and ideas at your disposal.
Another way I find ideas is by walking through the isles of my local hardware store and scanning all the shelves for things I can use in my own work. I can’t believe some of the things I’ve found that aren’t meant for trimmers, but come in really handy on the job. So keep an eye out!
You can find design ideas anywhere. For example, I got my design for some speaker grills on a Ford F100 I did not long ago from the headlights of a Mercedes-Benz. I’m in the process of making a custom door trim at the moment and I’m getting an idea for the design for the speaker grill and surround from the front bumper bar of an AMG Mercedes. It just so happens I’m digging the designs of the new Mercs lately. I’m just trying to illustrate that you can get ideas from everywhere. So keep your eyes open!
10. Don’t Ignore Small Things that Can Make a Big Difference
For instance…
- Use the correct sewing machine needles. Whether that be the correct size for the thread you’re using or using knife point needles for leather, they make a big difference!
- Use good quality thread. Stay away from 100% cotton thread, always try and use a polyester thread or a UV-bonded thread.
- Use the right stitch length. When sewing two pieces together use a short length. When top stitching, there’s nothing worse than it being too short or long. Keep it somewhere in the middle
- Get your thread tension right on your machine. I can’t stand seeing the bobbin thread poking through the top of your piece or loose top stitches. Play around with some scrap material and get it right.
- Always do a test piece to see if you have everything right before you sew.
One last thing — and this is more advice than tip — work hard to become a jack of all trades. In our craft, it’s no longer good enough to just know how to sew. To pull off show-quality interiors, you need to be able to do metal work/machining, welding, woodwork/carpentry, auto electrical, fiberglass, etc. Knowing these things will help you design better interiors and make you less dependent on others.
So there you have it — some of my best tips for taking your trimming to the next level. I hope you can take something helpful from it. Please share your thoughts in the comments section below.
— — —
Brent Parker is owner and operator of Brent Parker Motor Trimming in Glenorie, Australia. To see some of his outstanding work, visit his shop’s Facebook page and check out these articles on The Hog Ring.


Brent brought it to the point!! But there are still more things you should look at during using the tips of Brent. That was a peak of the iceberg of tips, you can use and they are very very helpful for many trimmers. We have to share our knowledge, be loyal to our branch and be open minded to the work.
Kruno.(I´m a master trimmer from germany, working in the devolopment for the german OEM´s)
hi kruno , do you have a website or information on how I could contact you please ..thank you .. andrew
great tips specially on concaves and wiggly piping. I’ll bookmark this. thanks brent.
Very good points! As a trim instructor, these are the types of little things I try to instill in students. Fit and finish will separate nice work from ordinary work.
Great tips. Thank you for sharing.
Awesome right up and great tips. I’m always happy to see new stuff from Brent Parker, thank you for the tips.
Your welcome guys. I could have written twenty more. I will leave that for another article:)
Great tips and even greater willing to share information. Worked for a shop long ago for 6 months got a better job but sorry now as I want to learn more but can’t find any good schools in the US. Admire Australlian tafe don’t know anything about schools in Europe and rest of world
I consider Brent a true ‘Master’ at our craft. He is obviously paying attention to EVERYTHING! I have been trimming almost as long as Brent has been alive, but I love seeing his techniques. I have picked up a number of things from Brent in the last couple of years. All I would like to say to Brent is…Give us 10 or 20 more!
Thanks for the kind words Dan. I will try to give 10 or 20 more, I will delve into my bag of tricks lol
Thanks Brent. The Hog Ring and Facebook have definitely made it much easier to share ideas. I have learned more in the past couple of years from these two sources than in the past 20.
You’re not the only one Steve. The last couple of years have been invaluable.
The hole article was very informing. The question is on #7 about bulk. Was that a straight cut to the top piece? Cant tell. Thanks!
https://www.thehogring.com/auto-upholstery-forum/auto-upholstery-forum-group4/lets-talk-shop-forum3/juki-lu-1508-thread737/
Check out this link. It will show how its done
I find we never stop learning ! When I first started upholstery I was restoring boats for a living and had been a mechanic for over 20 years and I went to the upholstery shop and I just had one little piece that needed covered and asked to buy a piece of vinyl to cover it myself because they were also back up a month ! I was given a stupid look and told I couldn’t do it myself and then over charged for the vinyl . I went home got out the wife’s sewing machine and took down the seat and cut out all the patterns It took me a good while but I wouldn’t take the comment that there wasn’t something I couldn’t do . That was the start , I ended up buying good equitment and finding a upholstery supplier that has always treated me right , and I have been doing upholstery work for over 5 years and take great pride in my work ! My point is don’t let anyone tell you there is something you can’t do !
Great article Brent, thank you for sharing! I have found so many of your tips to be invaluable – keep up the good work!
You’re welcome Geoff. Im glad you got something useful out of it. Some things people will know but some dont.
Would love to know more about the seamless French seams.
There is a write up on in it in the tutorials section of the forum
This is some really good information about upholstery. I have been thinking about updating several of my old upholstery chairs with new fabric. So, I liked that you talked about removing bulk from the fabric if you can. That sounds like it would be hard for me to do it myself.
Good point on using bobbin thread colour to match material.. For top stitching vinyl I have a heavier thread, but was told I cannot use this in the bobbin. What do I use on the bobbin?
Hi Brent, very useful article, thank you. The link you have to your Malaysian friend’s tip goes to an error page. Can you provide a working link please. Good to know your an Ozzie!!!