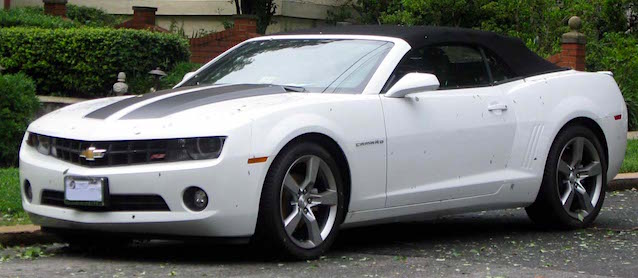
In 2011, Chevrolet introduced the convertible version of its fifth-generation Camaro. Two years later the automaker subtly redesigned its top and frame due to customer complaints of rubbing and excessive wear.
As a result, upholstery shops wanting to repair 2011 and 2012 models must retrofit the new canvas top on the old frame by making a number of modifications. Fortunately, they’re all listed in the following step-by-step guides.
On June 27, 2012, Chevrolet published procedure guide #P10756, titled “Retrofit Procedure for New Corded Folding Top Cover Installation to Original Design Frame.” Later that year, the automaker issued a more in-depth version, procedure guide #P10756b.
In short, the new-style top has an additional system of three cords per side of the top that the older top did not have. In order to retrofit the new top you’ll have to drill holes and mount hardware in very specific positions on the convertible top’s frame. Afterwards the guide will show you how to route each cord in the proper direction and through your newly added hardware.
The procedure guides outline steps for removal and assembly, and even provide photos to help you through the process.
With the oldest of these tops now having five years of wear and tear, expect to see more Camaros in your shop for top replacement. Of course, if they are model year 2013 and up you won’t have to worry about any modifications to the frame.
You can read and download the more in-depth procedure guide#P10756b below:
null
null
To read the original guide,#P10756, with color photos, click here.
For more helpful guides, check out The Hog Ring’s “Guides & Manuals” section.

I have worked on three of these tops. No more, not worth the aggravation. The only way to install all the complicated cord system is to have a new Camaro sitting there are a guide. Pictures are worthless.
I have done these and there are not as bad you think , I can trouble shoot problems and leaks.
Hi Rubin,
I’m starting an installation of an EZ-on top for a 2011 Camaro. Any information on steps I need to take will be helpful. Thanks
Hi there I’m installing a new top on a 2013 zl1 convertible I got everything put back together I’m only missing where the tension cables attach on bow 1. Any help figuring this out will be greatly appreciated
According to the Chevrolet shop manual, you have to unbolt the entire convertible top frame. I did it without doing that, but it was a pain. Have any of you found it easier to do it Chevy’s way?
How do you adjust the tension when closing the top
We have done two of these “Retro” Camaro tops. First top was 20 hours, 2nd top was 16 hours. Very tedious work. No real issues ……just A LOT of time.
I purchased a complete OEM top, frame, headliner and water bag as one unit for my 2013. The top assembly came from the GM plant in 2015 when they re-tooled for the Gen VI model. I am looking for instructions for removing the old top and installing the new one. I will also have to transfer the locking hardware and trim molding prior to installation. Any help would be greatly appreciated.
Did you ever get information on how to do this? I am going to do the same thing. I bought the whole frame assembly and would like to find out how to replace the whole thing at one time. I can’t seem to find any information on how to do this.
First things first, you’re going to have to remove the rear seat and quarter panel trim. Disconnect the defroster power line connector on the passenger side. Open the trunk and remove the brake light. Put the top about 1/2 way back. There are also 4 torx screws (t20 or t25) to remove under the brake light. Then feel around the inside of the well. There are 10mm nuts that hold down the rear tonneau trim pieces (dog leg or l shaped body pieces). Remove these nuts and then lift off the body pieces. Then you’ll need to remove the 5th bow stops from the well. You’ll need 3-4 strong friends. Disconnect the hydraulic cylinders where they attach to the top using a panel puller. There are two small plastic trim / water deflector pieces that have to be removed so you can get to the two bolts that attach the frame to the body of the vehicle on either side. Lay the top all the way down and carefully lift the top partially out of the vehicle. This should expose the drain lines for the water management bag. Disconnect these and finish removing the top. To install the new top basically repeat this in reverse.
Good luck!
looking over the instructions I’m seeing that it is best to remove the frame to replace the top but it doesn’t give details on how to do that. I have replaced a many tops in the last 15 years but this is my first newer model Camaro. Any help you can give would be greatly appreciated
I need the name of a good shop or person that does this work. I have a 2012 Chevrolet Camaro that a dealership damaged the top and refused to repair. I live near the Gulf Shores of Alabama but would be willing to have it towed to a reliable repair shop/person.
Really would appreciate some help. This car has been sitting in a repair shop for 4 months because they said it’s too much trouble.