Did you ever wonder how automakers make French seams lay flat? This tutorial by Brent Parker of Brent Parker Motor Trimming will show you exactly how it’s done.
From his auto upholstery shop in Glenorie, Australia, Brent details his process for creating a “Seamless French Seam.” Basically, a French seam without the selvage and unsightly bulk.
Pay close attention…
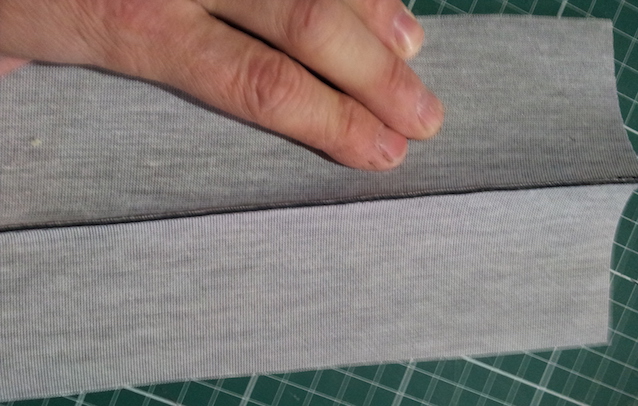
1. Sew your initial seam
Sew your pieces together with a very close stitch so that when you cut the selvage off you don’t see through:
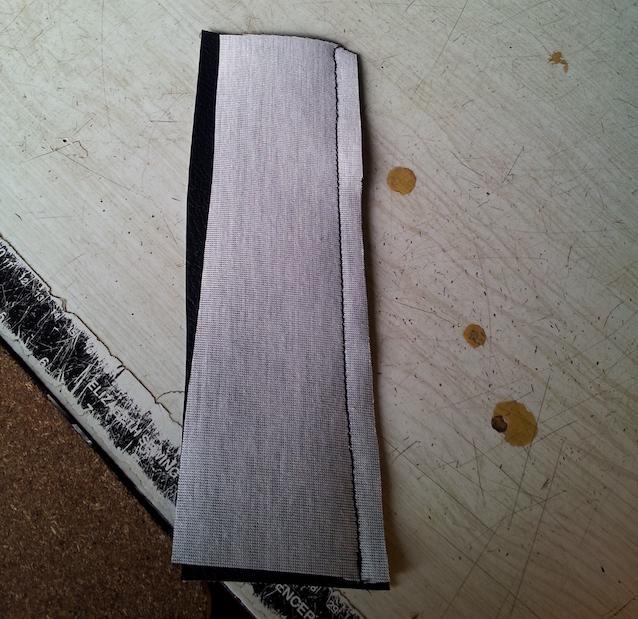
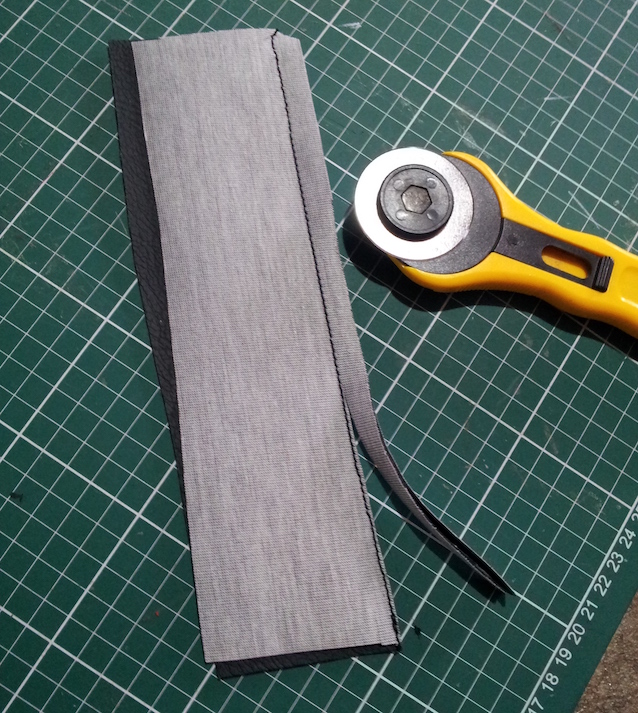
2. Cut off the selvage
Get your rotary knife or Stanley knife, and cut about 1 to 2 mm from the stitches. Take your time and make sure you cut evenly:
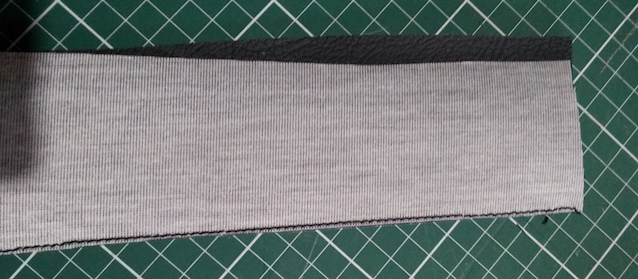
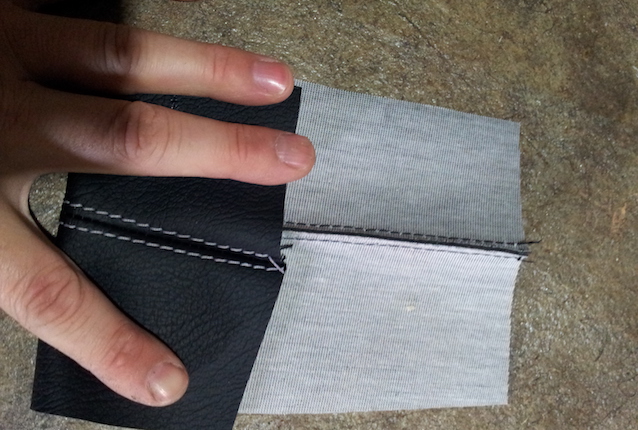
3. Now sew your French seam
Once the selvage is removed, you can sew your French seam.
Unlike traditional French seams, there’s no longer any selvage to sew through:
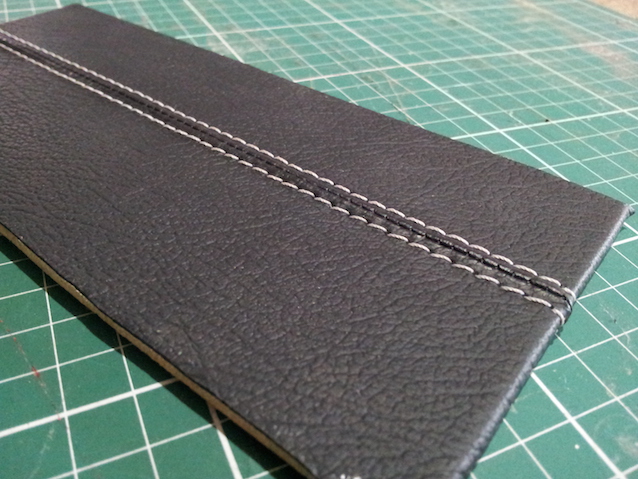
4. Flatten the Seam
Before you attach the panel, lay the piece on a bench and hammer down the seam. This makes it lay a little bit flatter.
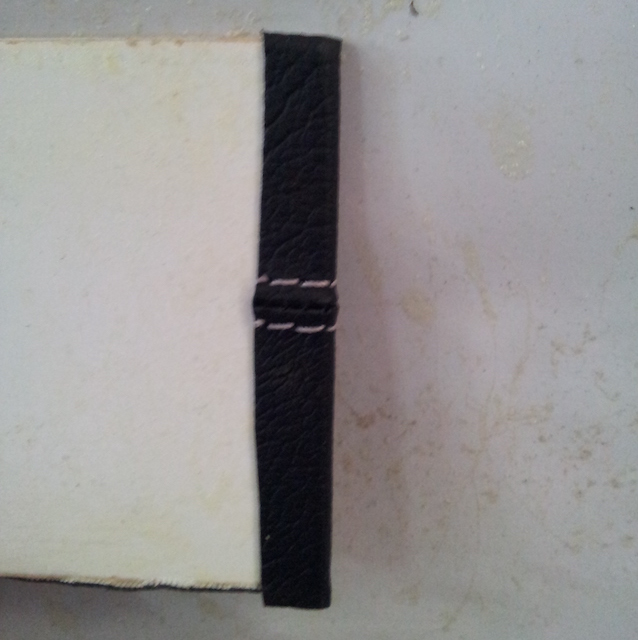
These two photos have the seam glued:

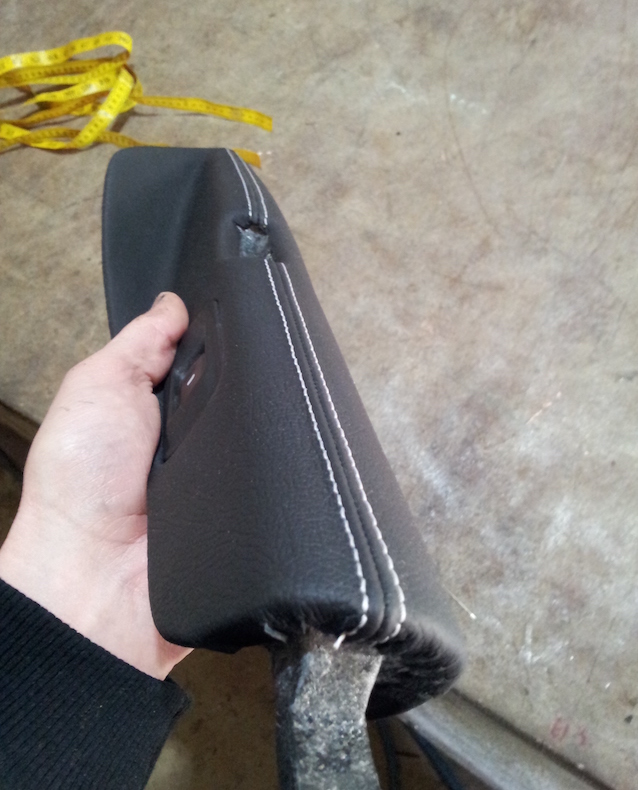
Notice how there’s virtually no bulk, even when wrapped around corners:
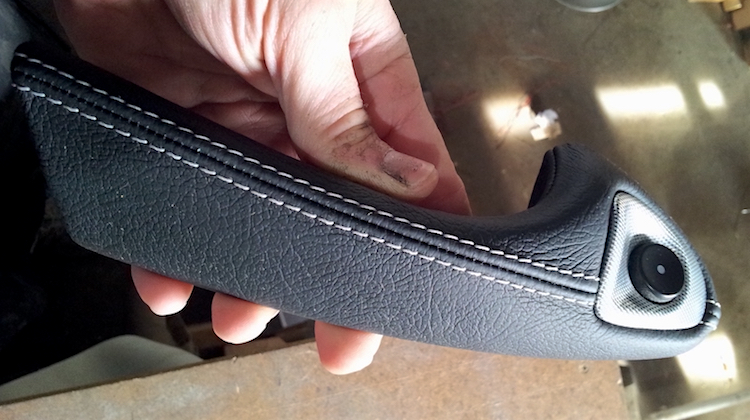
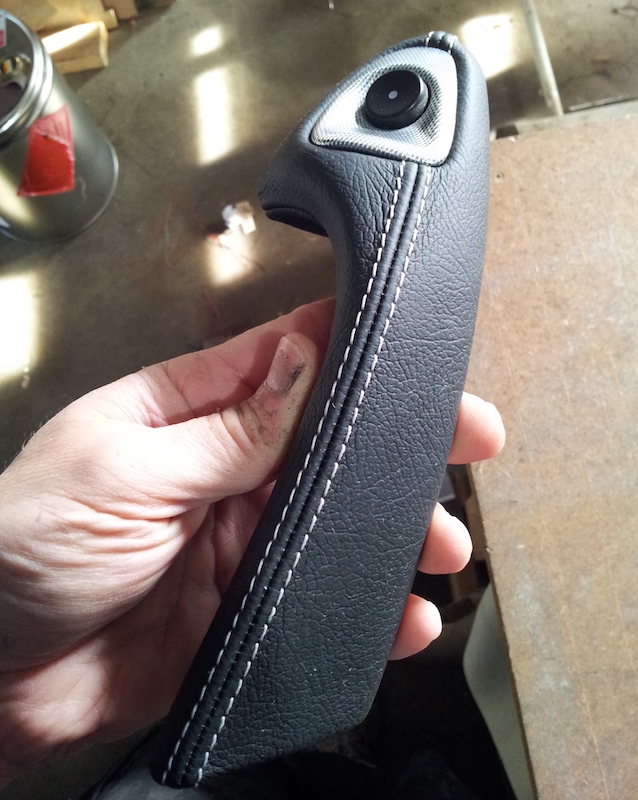
5. Wrap your interior trim
Here are some photos of this technique on some door handles:
Pros and Cons
There are a few different ways a French seam can be done, and there’s no right or wrong way. You just have to know which technique suits what you’re doing best. This method has its pros and its cons.
Pros:
- Absolutely no step-up to the stitches, has slight rise between stitches but this is fine.
- Sits nicely when glued down (only glue when necessary)
- Goes nicely around corners where fit is critical
- Because there is no material face folded around, there is less chance of lifting because you are glueing to the backside.
Cons:
- Takes longer and lots of practice to get right
- Because you are sewing through only one piece of material, the stitches don’t quite sit as nicely as sewing through two thicknesses.
- Thread tensions must be spot on.
To see more of Brent Parker’s work, follow his shop on Instagram and Facebook. Trust us, his interior projects will blow your mind.
Thank you for this , I always wondered how it lays so flat.
I like to see the top stitch before cutting off the salvage. It makes it a little easier to guide ur foot along the bulk edge rather than the little nub your foot will like to jump on and off of and give u a wavy top stitch
I like to sew my top Stitch before I cut off the Selvage. This gives you a more stable surface to walk your outer foot on so ur not trying to balance it on the little nub witch will jump out from under ur foot and cause a wavy top stitch
This is very helpful. I only wish I knew this a year ago.
Almost every seam in the Automotive industry now days are trimmed. Sewing machine manufacturers have actually developed automatic trimmers that cut the salvage off while sewing a join seam. We call them “trim joiners”. These machines have revolutionized the process of trimming an interior!
let the welt cord foot run the nub like a cord .. use the smaller welt foot if you have one
That’s the way Mercedes seat covers have been done for a long time now but they also put a thin backing cloth strip behind the seam.
That’s the best way. Without a tape backing there is only 1mm of material holding the seam together and in a seat cushion it won’t last as long
Ferrari does this on everything. That’s where I learned it.
Bitchin! So much show in the industry now on paint, metalwok, fab, etc, etc etc,, want to make a milion bucks.. Make a t.v show just about upholstery and trim..
Is there a concern for close stitch perforation tears or premature failure? Mercedes Benz Lear covers uses top stitch thru perforated leatherette which commonly fails. What is the recommended stitch length and needle size used in this technique to avoid the Mercedes problem from happening with vinyl, PU or leather?
Justin’s comment was spot on…. I recovered a bmw dashboard years ago and they used the nub style for the French seam… the bonus was the nub falls into a grove on the dashboard… it lays out well…. although I do get concerned about the seam being weak and tearing… I guess I’ve been doing it the old school way too long
I thought the purpose besides esthetics was to create extra strength in the stitch, trimming the extra off makes it weaker and more likely to tear, unless gluing of course
have often wondered how to do this
French seams has replaced welt on most car seats today.
Welt still looks good especially on older truck bench seats.